WOO HOO!

I started this blog to get to know other gardeners and track my own garden's progrss. It is a wonderful way to honor the stewardship I have over my plot of ground I have been blessed with. Thanks for stopping by!

Thursday, April 22, 2010

A Few Garden Wreaths


Be sure and check out the other "Fertilizer Friday" gardens - they are all so fun to see!
http://www.tootsietime.com/


Also linking to Show and Tell Friday http://romantichome.blogspot.com/


Lot's of fun things here too!


We have had a lot of rain and so our color of green is nearly flourescent -------------- it is beautiful.
(Today alone we received over an inch of rain - not bad considering that we get about 18 inches per year and that is mostly by snow!)
The only flowers blooming right now are daffodils. I have pictures of them in my next post. I thought I would share my garden wreath creation. The tools on this wreath were my mom's garden tools. I have saved them since her death and it is nice to have them back in the garden again.


*************************

Here are a few more garden wreath ideas I found:

Recycled Water Bottle Wreath

This wreath has a sweet story. Each of the hanging tin pieces are wishes. You can read about it here: http://www.penick.net/digging/?p=455


Cute Wreath from Michaels
http://www.michaels.com/art/online/projectsheet?pid=e08048&categoryid=

I love this one - I have an old garden trowel that was my grandmother's - I would like to make one like this and put her trowel in a place of honor in my garden.

http://www.lhj.com/relationships/family/crafts/garden-wreath/

http://www.junkmarketstyle.com/item/12379/summer-garden-hose-wreath Wreath by Junk Market
This hose wreath is from all crafts http://westwood.fortunecity.com/ghost/818/allcraftsfloral.htm This one was on photbucket, another hose wreath by Pammie Jo http://i206.photobucket.com/albums/bb177/pammiejo_bucket/IMG_2489.jpg This is another clay pot wreath http://forums2.gardenweb.com/forums/load/junk/msg0122581226509.html


This hose wreath from Cobblestone Nursery www.cobblestonefarms.blogspot.com/.../my-trash-to-treasure.html ******************
These are the instructions on how to make a hose wreath
http://www.ehow.com/how_2043791_make-garden-hose-wreath.html

A couple more links:
http://desertratsphotos.shutterfly.com/98
http://www.craftygardener.ca/garden3.html

************************
I also found this darling clay pot angel -
http://www.craftathome.com/Instructional/claypotgardenangel.html
Next week I would like to share some fun angels for decorating the garden.......
*****************************

Wednesday, April 21, 2010

Blooming Tuesday! There Are Daffodils in Idaho!

My daffodils are finally blooming. I just planted the ones with the pink center last fall and so excited to these daffodils this spring.

Thanks Jeane for hosting Blooming Tuesday again this week! To see more gardeners for Blooming Tuesday, visit http://msgreenthumbjean.blogspot.com/

Monday, April 12, 2010

All Kinds of Pot Ideas!


Linking up with Blooming Tuesday and Fertilizer Friday!

I am watching all kinds of green things come through the ground this week but nothing really blooming yet. I have also been cleaning out and I have a some empty spaces and lots of black plastic pots and other odd's and end's. I need some more pot ideas.
I have been looking online for ideas and this week I am showing you
some of the ideas I have found.
~~~~~~~~~~~~~~~~~~~~~~~~~~~~~~~
Planted ChairsThis website has all the instructions: http://faq.gardenweb.com/faq/lists/junk/2003053413030862.html ~~~~~~~~~~~~~~~~~~~~~~~~~~~~~
Look at these recycled black plastic pots. Instructions at: http://faq.gardenweb.com/faq/lists/junk/2003043245028444.html ~~~~~~~~~~~~~~~~~~~~~~~
Spraying Plastic Pots
Pastel Planters
Sometimes it's hard to find garden pots in exactly the color you're looking for, and often those pots come with a hefty price tag. Fortunately, it's very simple to follow these quick decorating tips to make over your existing garden pots, whether they're plastic, terracotta or enamelled. You can spray paint your pots to reflect the color of the flowers in your garden, or to tie in with the color scheme you choose for your garden accessories and furniture. The paint is tough and weatherproof - ideal for outdoor decorating.
You'll need
Two garden pots, Newspaper, White Primer, Satin Ice Cream, Satin Pastel Green
Hints & tips
"Apply Valspar Premium Clear as a top coat to prolong life of your revitalized pots."
Step by step guide
1-Clean your pots carefully with hot, soapy water to remove any traces of dirt or grease.
2-Lay out sheets of newspaper to protect your workspace. Your work area should be well-ventilated - if it's a clear day, you could apply the paint outdoors.
3-Apply White Primer to prepare the surface.
4- Spray one of the pots with Satin Ice Cream and the other with Satin Pastel Green.
.http://www.valsparspray.com/Idea/icode---5272
~~~~~~~~~~~~~~~~~~~~
This article has all kinds of ideas of "Junk You Can Plant In"
(Photo from Google Images)
Posted by Bigred: I just fished an old blue splatterware dutch oven out of my neighbor's scrap pile, punched holes in the bottom and potted it up w/impatients, coleus and caladiums. Turned out so pretty now I'm on the hunt for other junk to pot up. I also have an old chair w/ bottom planted and a septic tank clean out box planted 2-3 years w/semps,and other rock garden plants that have just gone wild so now I'm hooked on using "junk" to plant in.
Posted by xkmorris: Well when I retired last year I also retired my old steel toe work boots. They are planted with plants now and looks pretty good.
Posted by klynnnn: I have an old gray enamelware pot that I partially buried on its side and I have thyme planted in that next to some rosemary
Posted by patricia_mi: While I was up visiting my Fathers 40 acre christmas tree farm, I found an old metal childs potty (white) with several holes in it. I was thinking some pretty strawberry plants or hen & chicks would look nice.
Posted by goofyj: I like baskets and have one small one with a lid that opens and makes a backdrop for the plants. I also have a picnic basket that the lids open to the middle and I will put pots of mums in; a kids tractor about 18" tall with plants inside, and a kids rocking chair with pot on the seat. Problem is the deer, now they jump up on the porch to taste the goodies.
Posted by Phyllis__MN: Last year I planted an old coal bucket with impatiens, which looked really nice, and a Red Flyer wagon with fibrous begonias which was gorgeous. I have a pair of black rubber kids boots that are going to be planted with shasta daisies today.
Posted by Bigred: Sets me to thinking about the old wooden soda crates I have out back. Since semps don't need much watering maybe plant 2/3 in semps and fill the other holes w/ gravel. Have an old wooden tool caddy (double wide) that would look great w/pots of mums in the fall.
Posted by chancygardener: I have this cute wooden crate type thingie from the grocery's dumpster. Green beans came in it (stamped on front that its beans). It's that real thin wood that's tied/hinged with thin wire and a lid that's hinged on so that's its like a box. I put 2 old black nursery pots full of my geranium cuttings and jew cuttings inside (the pots don't show).
Posted by Seamommy: Out by the well house I have a copper tea kettle someone threw out. I put a hole in the bottom and partly buried it. It looks pretty cute too.
Posted by luvsroses: I planted snapdragons in a little metal wheelbarrow. It is only about 7 inches tall or so.
Posted by pplantlady: I plant up everything.....boots, old sinks, bathtubs, chairs, schooldesks, teacups, beds....you name it! If it will hold soil...it will hold a plant. One of my garden favs.....a childs bed. It's a couple of years old now and was originally planted as a quilt with a pillow. Now its just a catch all for extra seeds. I like that wild look aboutit. My sweetie and I got it for ten bucks and he built me a wooden box where the mattress was. We drilled holesin it for drainage and planted it up. It has faded a bit from the sun....but it still looks pretty cool!
Posted by CraftyGardener: I have an old drum from a washing machine planted with mint. Other things I have planted in are frypans, saucepans, teapots, old mugs, old wheelbarrows, and old seed spreader, old wicker baskets ... just about anything that can hold dirt can become a planter.
And here are a few more ideas from Member CraftyGardener (her member name speaks for itself!):
Fill an old wheelbarrow with dirt and plant in it. If it is rusted out like mine was you won't need to add drainage holes. I have chives, hens and chicks, and some other ground cover plants that like to trail over the edges. Any old piece of garden equipment is great for planting in. I have used an old seed spreader, old metal buckets, an old watering can, and old wheelbarrows. Remember to add drainage holes.
Use old tires filled with dirt to put tomato plants in. During the day the tires soak up the heat and over night that helps to keep the plants warm. I have seen old sinks, bathtubs and even toilets filled with plants on various gardening shows on television. Barrel halves, old or new, make great containers for plants. You can even transform them into mini water gardens. A great place to put lots of pots of various sizes is in a old child's wagon.
Interesting pieces of pottery, bowls, tea cups,tea pots, mugs, bowls etc. found at garage sales look beautiful with small plants in them. Old plates placed under pots act as a catch-all for the water. An old saucepan, a teapot and cup and saucer, an old fry pan and a metal bucket filled with various plants sit in my "pot garden". http://faq.gardenweb.com/faq/lists/junk/2003054940029002.html
~~~~~~~~~~~~~~~~~~~~~~~~~~~~

(Photo from Google Images)

What do Junkers use for Flower Pots?
Posted by Fanni: Now that summer is coming and my plants start getting "babies", I never have enough pots. I use all kinds of things as pots, yogurt cups, old plastic cups, buckets. I'd be interested to know, what do you guys use as pots?
Posted by Kim_in_AB: Everything ! I have old tin soup pots, a taken apart wok, a mysterious metal thing - I have no idea what it was in it's former life. Anything that will hold dirt becomes converted into a flower pot or seedling pot in Spring.
Posted by Rosebud531: One thing I ended up using is a stainless steel coffee pot. It's the kind you put on your firepit. The top (glass) had broke, so I put some soil in it with some flowers and have it hanging from my shepards hook. I have gotten so many compliments from it. I love to have unique things in the garden.
Posted by Jan_Hobbs: I have a couple of old coal buckets that make very nice planters. Last year I had caladiums, ivy, and a trailing sweet potato plant in one. Something else I use is my DH's old "brogans" (high top work boots) they usually have cracks in the sides when I get them and so are perfect for drainage. Just make sure you stuff the dirt all the way to the toes. You just have to watch the soil to keep it from getting too dry. Then I have an black antique baby shoe that I have a tiny plant in on my kitchen window. Hen and chicks really look good in it. I use an old kerosene heater for a fern stand. I also have a couple of 'worn out' wheelbarrows that really look good with training plants in them. My DH says if it ain't nailed down, I will either paint something on it or plant something in it!
Posted by bouncingpig: Everything! I use old mop buckets, galvanized tubs, old enamelware basins & coffeepots, plain black plastic pots with mosaics on top, old toolboxes, a couple old chairs. You name it!
Posted by YUKON_GOLD: Old plastic bowls with drainage hole in bottom - now known as the official wax begonia containers. Old ice bucket, with holes drilled in bottom. Old angel food cake pan (used that one on the patio table and stuck the patio umbrella through the hole in the center).
Posted by CraftyGardener: Anything that can hold dirt can be planted in at my house ... old frypans and saucepans, cups and saucers, teapots, old wicker baskters, buckets, wheelbarrows, seed spreaders, old washing machine tubs, old boots, and the list goes on and on
Posted by handmayyd: A neighbor & I 'saved' some ski boots left by the dumpster in our alley - We painted one white with silver stars for her dil, put in an ivy (the one with the white edge) and are pondering what to do with the other - I think a pine tree seedling belongs in at least one.
Posted by CMWren: All of those cute mugs you've accumulated for years, don't want to ditch for sentimental reasons, but whose numbers are so great even the worst caffeine addict and laziest dish washer could never use them all... Glass jars don't make it to the recylce bin in my house because they get saved for water-rooting cuttings. I've even started filling all the pretty pottery bowls that I keep buying because I love them but never end up using for food. Why have them stacked on the sideboard collecting dust when they could be showing off a plant, and could have a plant in them to show off the lovely bowl?
TIP: For solid bottom containers or anything you don't want to put holes in: Bit of gravel in the bottom, piece of old window screen next, then soil on top.
Posted by nutcase: I have a grain scoop that is really cute with some Sweet William in it. A chicken watering can with moss in the bottom part and millon bells in the top. One large and one small galvanized bucket. Two large (larger than wiskey barrels) plastic containers that minerals for cows came in.
Posted by LibbyLiz: I use: Bush's Baked Beans cans (16-oz sz) with yogurt cups inside; An old painted label Musselman's Applesauce can with a Solo drink cup inside; Coffee cups with yogurt cups inside; A white metal red-rim wash basin; A blue spongeware canning bath with a pot inside; A coal bucket with a pot inside; A porcelain chamber pot with a pot inside; A 1970's copper hanging bowl-type thing with a yogurt cup inside; A little red wagon; An American Indian pottery votive candle holder with a 3-oz plastic Solo bathroom cup inside; A 5-gallon bucket for 'maters; A 5-gallon bucket for Elephant Ears *** The 5-gallon buckets may get decorated with Con-Tact adhevsive shelf paper; Pre-decorated margerine containers; Pre-decorated Cool Whip containers; and clear deli containers.
TIP: For all the plastic cups & containers, I use a wood burning tool with a round tip to make drainage holes and for the 5-gallon buckets, I use a drill & the largest bit I can find to make drainage holes.
bean57: Galvanized washtubs, old copper fish boilers, old farm pee pots, brass fire extinquisher, wooden tool box, washbasins. I like containers that look rustic and old fashioned.
iracountrygirl: I love to find those cheap they can't hardly give them away baskets. I just spray paint them. I have some spray paint that I think the color is called pottery or old pottery. It's a real dark terracotta color and I use the flat (no gloss). You can even glue the flat marbles (gems) on them to dress them up and give them some sparkle. If you want to sit the basket on anything that needs protecting just line the basket with plastic before you fill it. They look really great. They're really cheap. They come in every size. I love them!
TIP: I use a soil mix for my containers that is roughly (very roughly!) 75% soiless potting soil, 25% good garden soil, time release fertilizer (pellets) and some of the water absorbing crystals. http://faq.gardenweb.com/faq/lists/junk/2003052512005288.html

~~~~~~~~~~~~~~~~~~~~

Here are some other fun links with a more ideas including bowling ball gallery, back of a toy truck, more chair ideas, teapot bird baths and more:

~~~~~~~~~~~~~~~~~~~~~~~~

As always thanks to Jean for Hosting Blooming Tuesday and Tootsie at Fertilizer Friday!

To see more great Blooming Tuesday Gardens visit : http://msgreenthumbjean.blogspot.com/

To see more Fertilizer Friday Gardens, visit: http://www.tootsietime.com/

Thursday, April 8, 2010

What a Difference A Week Makes!

I was hoping I would have more to share today - but we have had two snowstorms which slowed down the growth of our spring flowers.

~~~~~~~~~~~~~
What a Difference a Week Makes!
My First Daffodils

I took this picture a week ago today. I see yellow ready to pop. Woo Hoo!

~~~~~~~~~~~~~~~~~~~~~~~~~~~~~

This is Today Same flowers - Daffodils are the most amazing flowers!

These are "Snow on the Mountain" popping through in the side yard - All over my yard I have all kinds of green things doing this! WOO HOO!~~~~~~~~~~~~~~~~~~~~~~~~

One of my favorite tree's in the yard is the my blue and glass Bottle Tree! It is in the play yard and next to the Fairy Garden. It is pretty scuffed from winter - but I wanted to share it with you today - needs to be cleaned and straightened, but what a fun little tree to see out my window all winter long.


Just a little more snow to melt
~~~~~~~~~~~~~~~~~~~~
I also did my first fertilizing of all my perenials this morning...spring is really here.
Be sure and stop by http://www.maydreamsgardens.com/ to see lots more gardens from everywhere! So fun to see all the different stages different parts of the world are in right now.

Monday, April 5, 2010

Bloomin Tuesday - My Entry!

I love it when I can clean out our entry area. It is a sure sign that spring is here. It is 42* here and that is so perfect to be able to finally get outsie and clean out flower beds.

The snow is melted and there are things coming up all over!

Here are a few pictures

BEFORE
AFTER:

I have to share a minute about this entry way - it was one of those spots that was awful to work in. It was a shade garden and I didn't know anything about shade gardening. Several years ago I decided to give shade gardening a try and put in an Oriental Garden. The entry way with the tree is so perfect for it. I added bamboo sticks, bamboo wind chime and oriental pots. We added the rock square (above) because we had a hard time getting things to grow right under the tree. It adds so much ambience to the garden area . You can't see it but there are large glass marbles scattered through the rock. The plants in this area include sweet woodruff, columbine, lilly's, hosta's, and more. I add pansy's, begonia's and other oriental annuals to the pots. Each year I choose a color theme for this area, thinking about doing it in coral and purple this year, but still not for sure. I hope to find an oriental statue this summer to add to this garden.

You can see a few plants!
Then it started to rain then snow........so I had to come in the house. ~~~~~~~~~~~~~~~~~~~~~

This is what we woke up to today - same space! Good thing I cleaned out yesterday - when the snow melts it will be so nice and clean!!!

Next week I should have some daffodils from my cutting garden area to share.

As always thanks to Jean for Hosting Blooming Tuesday. Be sure and visit her blog to see more Blooming Tuesday Gardens. http://msgreenthumbjean.blogspot.com/

Thursday, April 1, 2010

Fertilizer Friday - A Little About Peony's

Thanks to Toostsie for hosting - you find the links to other Fertilizer Friday Gardens at: http://www.tootsietime.com/

~~~~~~~~~~~~~~~~~~~~~~~~~~~~~~~~~~~~~~~~~~~~~~~~~~~

It is cold and I am sitting at my computer watching a blizzard. It is snowing and the winds are gusting at 60mph. It is a good time for me to do some "Plant Studying " and recover from being so "OUT OF YARD SHAPE!"
~~~~~~~~~~~~~~~
Peony's
When I cleaned out my beds last week I have peonies just peaking through.
WOO HOO!

I have two kinds - pure white which was my mom's plant........

.....and I also have dark pink which belonged to my paternal grandmother. She was born in 1890 and died about 45 years ago. My uncle was cleaning out his flower beds and had these plants from her garden. He gave me quite a few starts, so I have them planted all over my yard.

My dark pink one's look like this:

I always use a peony ring or a cut down tomato cage each plant to help give them support.

~~~~~~~~~~~~~~~~~~~~~~
A Little About Peonies

The care of peonies is a relatively simple and maintenance free task. These beautiful plants with their large flowers and subtle fragrance have been cultivated for hundreds of years and are really quite easy to grow. Once you have an established plant it can grow on for up to 50 years!
PLANTING - The care of peonies starts with the planting. Peonies are best suited for climates that have a winter season. They work best in full sun but will be tolerable of some afternoon shade. They like a well drained soil and can benefit from adding a bit of compost into the hole when planting. Plant in early fall with the eyes being no deeper than 2" in to the soil.
CARE - Once you have them planted, the care of peonies is rather simple. It might take 2 years for them to bloom if you planted them from roots, but if you plant from a plant growing in a pot, you could see blooms that year. Fertilize in early spring and mid summer. A low nitrogen fertilizer is best and try to keep the fertilizer away from direct contact with the plant.
FERTILIZING - Apply mulch in the spring and water frequently in summer. Remove the side buds for larger flowers on the ends. Peonies tend to grow long stalks and can break or bend over almost to the ground if not staked -avoid letting them touch the ground as I have found that ants like to eat them and ruin the flowers! Remove the flowers as soon as they fade - they make a wonderful and fragrant bouquet in a vase!
http://www.backyard-garden-and-patio.com/careofpeonies.html
***The peony is the Indiana State Flower - they also have an abundance of information to aid in planting and caring for these beautiful, vintage flowers. http://www.hort.purdue.edu/ext/ho-76.pdf

~~~~~~~~~~~~~~~

Wishing you all a Happy Easter!
I would love to have you visit me in my Easter Blogging room,
when you have some time. http://www.bucketsofspringideas.blogspot.com/

Tuesday, March 30, 2010

Hosta's - My Garden of Eden Plant!

Be sure and check out the other Bloomin Tuesday gardens athttp://msgreenthumbjean.blogspot.com/
Thanks Jeanne for hosting this for us each week!
Be sure and check out the other gardens at Jean's blog......

It is a rainy day in Idaho today, so I get a study day. I have wanted to study a little more about Hosta's for my yard and so I wanted to share some thoughts about "Hosta's" with you today for Blooming Tuesday.
~*~*~*~*~*~
The first time I saw a Hosta I was about 12 years old. We toured the gardens at Ricks College (now BYU-Idaho) in Rexburg, Idaho. I had never seen such huge leaves on such a beautiful plant. I asked everyone I knew what the name of it was and nobody around had ever seen anything like it either. All I knew to call them was that plant that looks like it should be in the Garden of Eden. After I was married my mother in law had one in her yard and I found out what it was called. I have been hooked ever since! This is a start of that Hosta that I got from my Mother -In-Law's yard several years ago - it likes it at my house!
~*~*~*~*~
When we added out side yard, I knew I wanted Hosta's as the staple of the garden. They are all starting to fill in now and look amazing....but there is always room for more.
~*~*~*~*~
I also planted Hosta's along the front of our house. It is on the north side and they love it there. That garden is called "The Hosta Bed"

~*~*~*~*~
My first Hosta is starting to pop!
This is what this Hosta will look like this summer. It is planted in the entry area.
Isn't it so beautiful! I love it!

A little about Hosta's
They need to be fertilzed in late fall or early spring, preferably before they break ground. (Which for me is right now!)
  • If you are going to divide them you need to do it first thing in the spring, just as they are coming through the ground
  • You can split some of my hosta's to move to other parts of the garden and to give starts away.
  • The first year they grow slowly, once they are established they really pop!
  • They are at their best in the shade. Their large leaves indicate this.
  • The varieties that are more yellow tolerate the sun better than the darker colors.
  • There are hundred's of varieties of Hosta's. There are Hosta's with veriigated leaves, blue eaves, yellow leaves, lime leaves, small leaves, big leaves and every size in between.
*~*~*~*~*~
Here are a few links with some Hosta Information:

~*~*~*~*~*

Saturday, March 27, 2010

I Planted My Sweet Peas This Week!

I love Sweet Peas! Both of my grandmother's grew them. I remember their wonderful fragrance and how beautiful they were. We used to sit in their shade and watch as bee's would fly into them. I have always wanted to plant Sweet Pea's. Several years ago we added a play yard area with a little picket fence around it. The perfect spot for sweet pea's.

Sweet Pea's have to be planted in the spring first thing. They need cool weather to get established but once they start they explode!
~*~*~*~*~*~
We woke up to a little snow this morning, this is a picture of the area I planted yesterday. One of the great things about Sweet Pea's, they will be just fine!

How to plant sweet peas:
1 - You need to prepare your soil bed. Clean it out, turn the dirt over and make it loose.
2 - Dig a trench about 2 inches deep and you are ready to plant. Some people nick their seeds. It will help them to absorb water and germinate a little faster. I have never done that, but others do.
3 - I put down 3 seeds per every 3 inches or so.
4 - Cover them up with the dirt and then water.
5 - I add a little of my homemade brew fertilizer and it is done!

Make sure you water them every other day or so until you see them germinate which takes about 10 days to two weeks. If it rains (or snows), then mother nature does that for me! After they grow and are blooming, if you pick the flowers you will have them blooming until it freezes in the fall.
Pictures from last year
These show how quickly they grow and fill in.

This was taken late May - you can see little plants starting to grow along the picket fence. ~*~*~*~

Just a couple of weeks later they are taller and starting to produce flowers.
~*~*~*~*~
See how much they have filled in, this was taken in mid- July, they continue to grow and fill in. By summer's end you can't see the fence anymore and the fragrance drifts all over the yard.
~*~*~*~*~

Sweet Peas
by the National Garden Bureau
Sweet peas are one of the easiest flowering annuals to start from seed. Sweet peas need a site with full to partial sun and deep, rich, loamy, moist but well-drained soil. Add plenty of organic matter (compost, well-rotted manure, leaf mold, or humus) to enrich the soil and make it more friable.
Timing by Region
Each region has its own unique "season" for growing sweet peas. See article for detailed regional plantinf information
Preparing Seed
Sweet peas will need about 50 days of cool temperatures (under 60º F) to bloom gloriously in your garden. Sweet pea seed has a hard, water insoluble seed coat. Nicking the outside coating of a sweet pea seed with a nail clipper will allow rapid hydration of seeds and does both speed and increase germination. Sweet pea seed will germinate in soil at temperatures of 55º to 65º F or 13º to 18º C.
Sowing Seed
Plant seeds in holes that are about two inches (two knuckles) deep. Drop two to four seeds per hole, with holes spaced four to six inches apart. Water thoroughly and keep soil moist until seeds have sprouted. Expect germination in about 10 to 21 days. Once the seedlings are growing, water regularly to promote strong, healthy growth.
Staking Sweet Pea's
When planting tall, long vine sweet peas, it’s best to place the stake or support in the ground at the same time as the seed or transplants to avoid damaging the roots. Trellises, bird netting strung between two stakes, string, twine, or fishing line hung from the top of a split rail fence, a bamboo teepee, brush stakes - all are good verticals for sweet peas to climb
Garden Care
Do not over fertilize or you’ll wind up with very deep green leaves but few flowers. A balanced 20-20-20 slow release fertilizer blended into the soil at planting time works fine for the initial plant development. Allowing the plant to produce seedpods will reduce overall flower production. Removing spent blooms will ensure more blooms. (Article has more detailed information.)

Saturday, March 13, 2010

Learning How To Composte

Our bins! There are two to brew in, one to store brown and one to store green.
I already have brown and green layers and now the next brown layer has been added.
-----------


One of my projects this week has been to study about composting until I get it! I found a great article about it that helped me finally get my head around it. We found pallets and this week we were able to make them. Here they are........WOO HOO!!!
Here is the article:
*********
Great post on composting over at "I refuse to recede"
http://i-refuse-to-recede.blogspot.com/2010/05/fertilizer-friday-composting-part-1.html

**************
This is from my friend Betty's Blog - she has some great composting articles

Tuesday, March 9, 2010

Greenhouse & Your Family

I am totally excited that I am adding a greenhouse to my gardening this spring/summer. I have been researching greenhouse gardening and can see so many benefits from doing it. For those of you who have children at home, gardening is always more fun when it's done with the family. No matter if it is a garden inside or outside! There are many wonderful ways to share lessons with your children through gardening. I am ready to spend some time with my grandchildren there and help them learn a love for the dirt like my Grandmother taught me.
Here are a few resources when you are getting ready to take your child to the greenhouse/ garden or the containers in your home:
~Teach kids the 5 senses while gardening More Info
~Even if there is snow on the ground there are possible winter activities with plants! More Info
~ Teaching children how to grow plants in the soil is a wonderful way to share valuable principles about family life. More Info
~Teach your children early about the rewards of gardening More Info
~Kids enjoy the messy, dirty and wriggly side of gardening. All kids like to get some dirt on them! More Info
Having a garden is a way to teach your children and have fun with them all at the same time! This is what people sat about the benefits of a greenhouse in their families Video
For more information about the greenhouse I am using, you can contact: brent@tuffgreenhouses.com you can also click on the side bar of the blog at the top for a link.

Saturday, March 6, 2010

Tip for this Week - Yellow Hoses

This weeks tip is easy - do not buy a yellow hose. It attracts bee's. In the summer all along where it is at are bee's flying around all along it's length. I remembered this because today while cleaning the end fell off and it has a few leaks - I have never been so happy to throw away a hose! YIPPEE!

My Cutting Garden

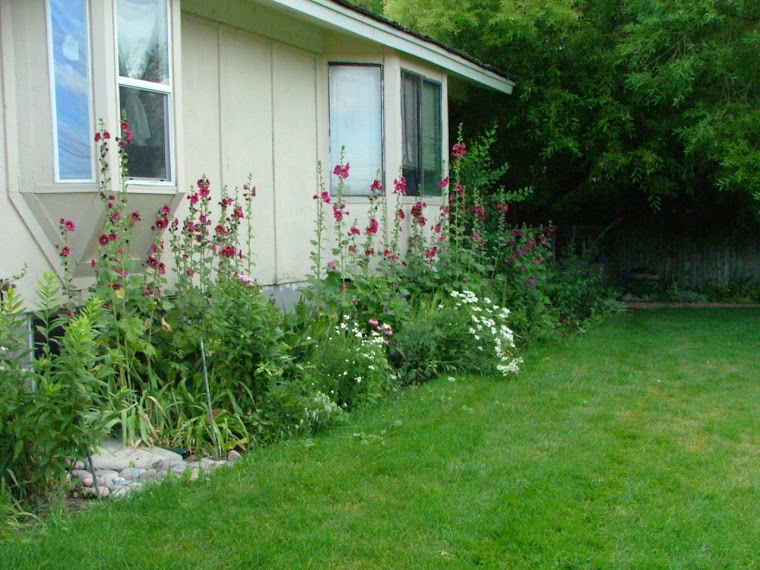
Along the back of our house on the south side is my (our) cutting garden. It is full of perenials and blooms with different flowers all season long. The snow is melting away from our house, so it is the first garden that can be cleaned out. I have Iris that have really spread forward. I am going to dig them all out and move them else where. I also need to clean out some grass in a few spots. Some of the flowers are hollyhocks, daisies, peonies, cone flower, lambs ear, iris, mint, all kinds of bulbs and a bunch of others.
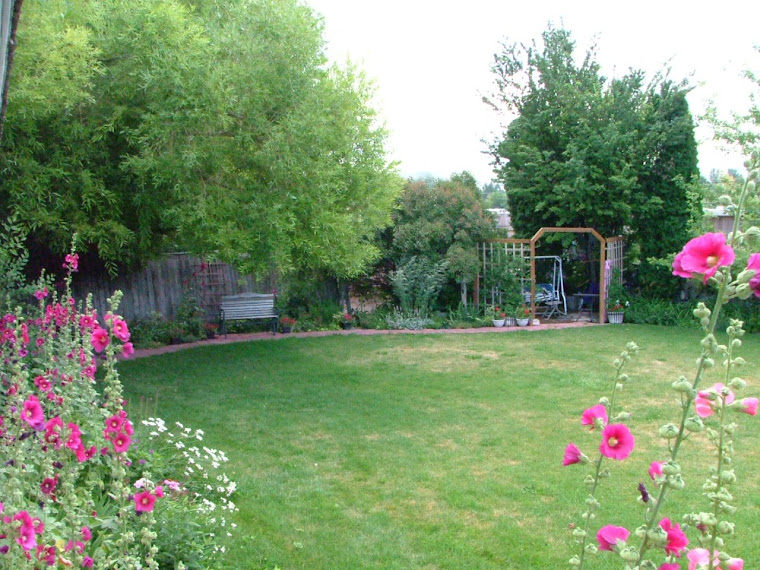
When I was finished raking and cutting, there are little green things poking up through the ground everywhere!
If you have a spot that you can put a cutting garden into, I would highly recommend it.
This is a picture of the back yard, you can see where the snow is melting. It was 39* today and sunny and so warm. I worked out without a coat and only garden gloves.


This is the cutting garden after it is all cleaned out.

This is a post I made last year about this area that shows before and after pictures.
http://bucketideasforgardening.blogspot.com/2009/02/cuttiing-garden-before-and-after.html

Thursday, March 4, 2010

It's Called Spring Fever!


It's spring fever.

That is what the name of it is. And when you've got it, you want - oh, you don't quite know what it is you do want, but it just fairly makes your heart ache, you want it so! ~Mark Twain

~*~*~*~*~*~*~*~*~
I raked my cutting garden today - I am in Idaho and this is amazing! I got it about 1/2 way cleaned out. I want to get it done early because I need to thin out my Iris' and wasnt' able to do it last fall. When I moved everything I have all kinds of green poking up through the ground. The snow melted from this spot day before yesterday and there was green going on under it!
Click on OLDER POSTS to see more gardening posts