WOO HOO!

I started this blog to get to know other gardeners and track my own garden's progrss. It is a wonderful way to honor the stewardship I have over my plot of ground I have been blessed with. Thanks for stopping by!

Tuesday, March 30, 2010

Hosta's - My Garden of Eden Plant!

Be sure and check out the other Bloomin Tuesday gardens athttp://msgreenthumbjean.blogspot.com/
Thanks Jeanne for hosting this for us each week!
Be sure and check out the other gardens at Jean's blog......

It is a rainy day in Idaho today, so I get a study day. I have wanted to study a little more about Hosta's for my yard and so I wanted to share some thoughts about "Hosta's" with you today for Blooming Tuesday.
~*~*~*~*~*~
The first time I saw a Hosta I was about 12 years old. We toured the gardens at Ricks College (now BYU-Idaho) in Rexburg, Idaho. I had never seen such huge leaves on such a beautiful plant. I asked everyone I knew what the name of it was and nobody around had ever seen anything like it either. All I knew to call them was that plant that looks like it should be in the Garden of Eden. After I was married my mother in law had one in her yard and I found out what it was called. I have been hooked ever since! This is a start of that Hosta that I got from my Mother -In-Law's yard several years ago - it likes it at my house!
~*~*~*~*~
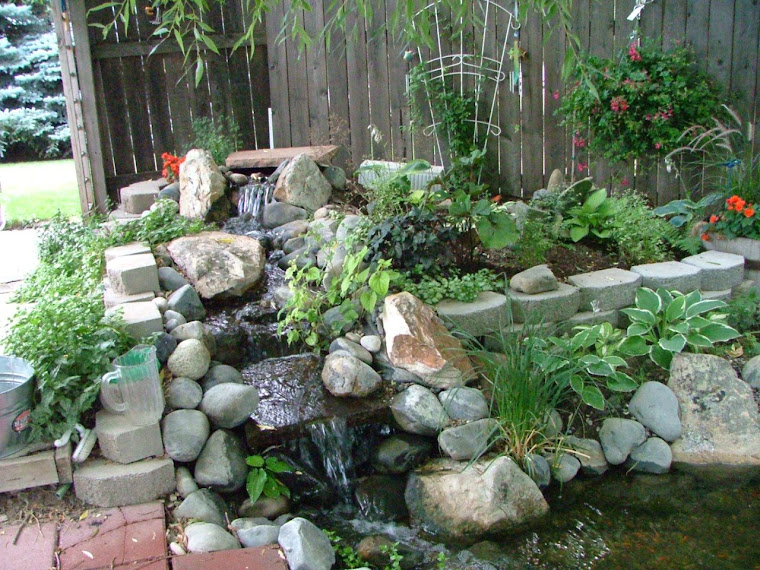
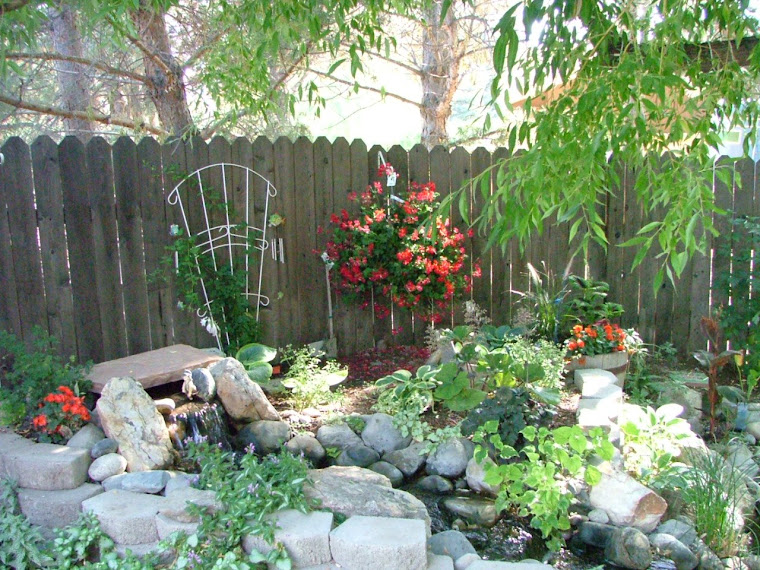
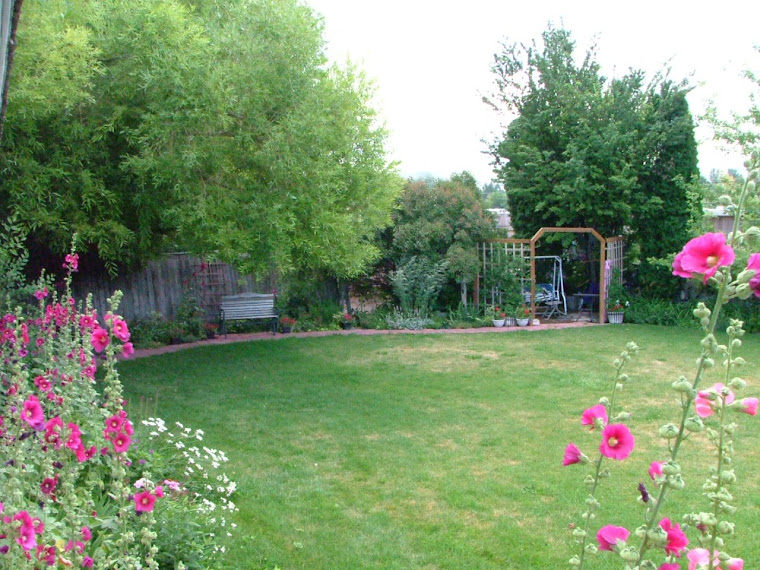
When we added out side yard, I knew I wanted Hosta's as the staple of the garden. They are all starting to fill in now and look amazing....but there is always room for more.
~*~*~*~*~
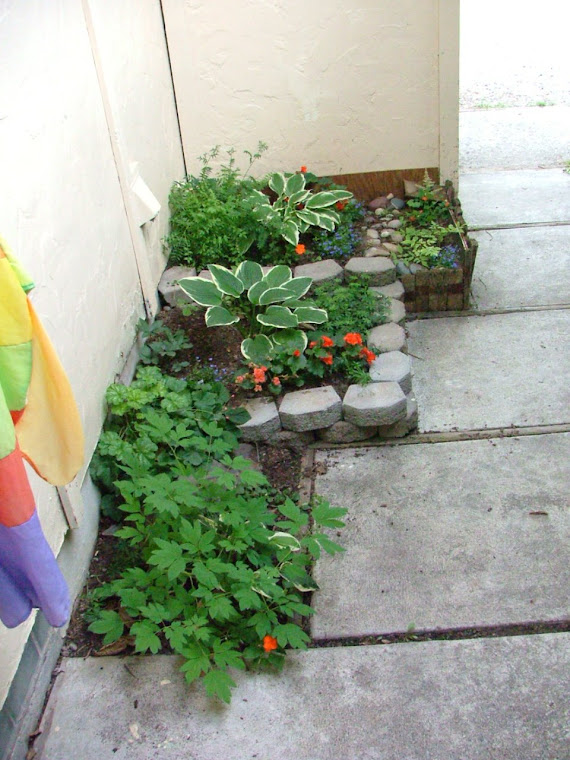
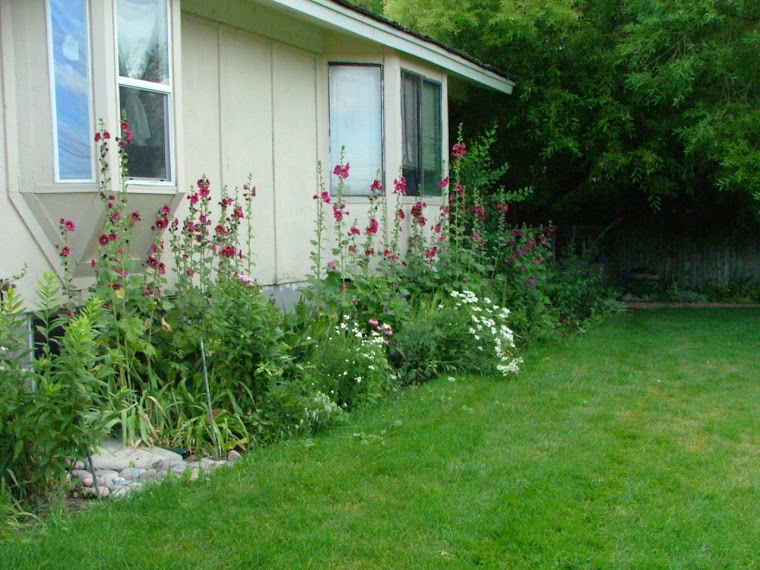
I also planted Hosta's along the front of our house. It is on the north side and they love it there. That garden is called "The Hosta Bed"

~*~*~*~*~
My first Hosta is starting to pop!
This is what this Hosta will look like this summer. It is planted in the entry area.
Isn't it so beautiful! I love it!

A little about Hosta's
They need to be fertilzed in late fall or early spring, preferably before they break ground. (Which for me is right now!)
  • If you are going to divide them you need to do it first thing in the spring, just as they are coming through the ground
  • You can split some of my hosta's to move to other parts of the garden and to give starts away.
  • The first year they grow slowly, once they are established they really pop!
  • They are at their best in the shade. Their large leaves indicate this.
  • The varieties that are more yellow tolerate the sun better than the darker colors.
  • There are hundred's of varieties of Hosta's. There are Hosta's with veriigated leaves, blue eaves, yellow leaves, lime leaves, small leaves, big leaves and every size in between.
*~*~*~*~*~
Here are a few links with some Hosta Information:

~*~*~*~*~*

Saturday, March 27, 2010

I Planted My Sweet Peas This Week!

I love Sweet Peas! Both of my grandmother's grew them. I remember their wonderful fragrance and how beautiful they were. We used to sit in their shade and watch as bee's would fly into them. I have always wanted to plant Sweet Pea's. Several years ago we added a play yard area with a little picket fence around it. The perfect spot for sweet pea's.

Sweet Pea's have to be planted in the spring first thing. They need cool weather to get established but once they start they explode!
~*~*~*~*~*~
We woke up to a little snow this morning, this is a picture of the area I planted yesterday. One of the great things about Sweet Pea's, they will be just fine!

How to plant sweet peas:
1 - You need to prepare your soil bed. Clean it out, turn the dirt over and make it loose.
2 - Dig a trench about 2 inches deep and you are ready to plant. Some people nick their seeds. It will help them to absorb water and germinate a little faster. I have never done that, but others do.
3 - I put down 3 seeds per every 3 inches or so.
4 - Cover them up with the dirt and then water.
5 - I add a little of my homemade brew fertilizer and it is done!

Make sure you water them every other day or so until you see them germinate which takes about 10 days to two weeks. If it rains (or snows), then mother nature does that for me! After they grow and are blooming, if you pick the flowers you will have them blooming until it freezes in the fall.
Pictures from last year
These show how quickly they grow and fill in.

This was taken late May - you can see little plants starting to grow along the picket fence. ~*~*~*~

Just a couple of weeks later they are taller and starting to produce flowers.
~*~*~*~*~
See how much they have filled in, this was taken in mid- July, they continue to grow and fill in. By summer's end you can't see the fence anymore and the fragrance drifts all over the yard.
~*~*~*~*~

Sweet Peas
by the National Garden Bureau
Sweet peas are one of the easiest flowering annuals to start from seed. Sweet peas need a site with full to partial sun and deep, rich, loamy, moist but well-drained soil. Add plenty of organic matter (compost, well-rotted manure, leaf mold, or humus) to enrich the soil and make it more friable.
Timing by Region
Each region has its own unique "season" for growing sweet peas. See article for detailed regional plantinf information
Preparing Seed
Sweet peas will need about 50 days of cool temperatures (under 60º F) to bloom gloriously in your garden. Sweet pea seed has a hard, water insoluble seed coat. Nicking the outside coating of a sweet pea seed with a nail clipper will allow rapid hydration of seeds and does both speed and increase germination. Sweet pea seed will germinate in soil at temperatures of 55º to 65º F or 13º to 18º C.
Sowing Seed
Plant seeds in holes that are about two inches (two knuckles) deep. Drop two to four seeds per hole, with holes spaced four to six inches apart. Water thoroughly and keep soil moist until seeds have sprouted. Expect germination in about 10 to 21 days. Once the seedlings are growing, water regularly to promote strong, healthy growth.
Staking Sweet Pea's
When planting tall, long vine sweet peas, it’s best to place the stake or support in the ground at the same time as the seed or transplants to avoid damaging the roots. Trellises, bird netting strung between two stakes, string, twine, or fishing line hung from the top of a split rail fence, a bamboo teepee, brush stakes - all are good verticals for sweet peas to climb
Garden Care
Do not over fertilize or you’ll wind up with very deep green leaves but few flowers. A balanced 20-20-20 slow release fertilizer blended into the soil at planting time works fine for the initial plant development. Allowing the plant to produce seedpods will reduce overall flower production. Removing spent blooms will ensure more blooms. (Article has more detailed information.)

Saturday, March 13, 2010

Learning How To Composte

Our bins! There are two to brew in, one to store brown and one to store green.
I already have brown and green layers and now the next brown layer has been added.
-----------


One of my projects this week has been to study about composting until I get it! I found a great article about it that helped me finally get my head around it. We found pallets and this week we were able to make them. Here they are........WOO HOO!!!
Here is the article:
*********
Great post on composting over at "I refuse to recede"
http://i-refuse-to-recede.blogspot.com/2010/05/fertilizer-friday-composting-part-1.html

**************
This is from my friend Betty's Blog - she has some great composting articles

Tuesday, March 9, 2010

Greenhouse & Your Family

I am totally excited that I am adding a greenhouse to my gardening this spring/summer. I have been researching greenhouse gardening and can see so many benefits from doing it. For those of you who have children at home, gardening is always more fun when it's done with the family. No matter if it is a garden inside or outside! There are many wonderful ways to share lessons with your children through gardening. I am ready to spend some time with my grandchildren there and help them learn a love for the dirt like my Grandmother taught me.
Here are a few resources when you are getting ready to take your child to the greenhouse/ garden or the containers in your home:
~Teach kids the 5 senses while gardening More Info
~Even if there is snow on the ground there are possible winter activities with plants! More Info
~ Teaching children how to grow plants in the soil is a wonderful way to share valuable principles about family life. More Info
~Teach your children early about the rewards of gardening More Info
~Kids enjoy the messy, dirty and wriggly side of gardening. All kids like to get some dirt on them! More Info
Having a garden is a way to teach your children and have fun with them all at the same time! This is what people sat about the benefits of a greenhouse in their families Video
For more information about the greenhouse I am using, you can contact: brent@tuffgreenhouses.com you can also click on the side bar of the blog at the top for a link.

Saturday, March 6, 2010

Tip for this Week - Yellow Hoses

This weeks tip is easy - do not buy a yellow hose. It attracts bee's. In the summer all along where it is at are bee's flying around all along it's length. I remembered this because today while cleaning the end fell off and it has a few leaks - I have never been so happy to throw away a hose! YIPPEE!

My Cutting Garden

Along the back of our house on the south side is my (our) cutting garden. It is full of perenials and blooms with different flowers all season long. The snow is melting away from our house, so it is the first garden that can be cleaned out. I have Iris that have really spread forward. I am going to dig them all out and move them else where. I also need to clean out some grass in a few spots. Some of the flowers are hollyhocks, daisies, peonies, cone flower, lambs ear, iris, mint, all kinds of bulbs and a bunch of others.
When I was finished raking and cutting, there are little green things poking up through the ground everywhere!
If you have a spot that you can put a cutting garden into, I would highly recommend it.
This is a picture of the back yard, you can see where the snow is melting. It was 39* today and sunny and so warm. I worked out without a coat and only garden gloves.


This is the cutting garden after it is all cleaned out.

This is a post I made last year about this area that shows before and after pictures.
http://bucketideasforgardening.blogspot.com/2009/02/cuttiing-garden-before-and-after.html

Thursday, March 4, 2010

It's Called Spring Fever!


It's spring fever.

That is what the name of it is. And when you've got it, you want - oh, you don't quite know what it is you do want, but it just fairly makes your heart ache, you want it so! ~Mark Twain

~*~*~*~*~*~*~*~*~
I raked my cutting garden today - I am in Idaho and this is amazing! I got it about 1/2 way cleaned out. I want to get it done early because I need to thin out my Iris' and wasnt' able to do it last fall. When I moved everything I have all kinds of green poking up through the ground. The snow melted from this spot day before yesterday and there was green going on under it!
Click on OLDER POSTS to see more gardening posts